It's been more than two years since I last played any papercraft, kinda miss it :P How I wish it's 48hrs instead of 24 in a day! Recently I've been wandering around on PinInterest website (a great site with thousands of hobbies and DIY stuffs!) and came across this Hot Air Balloon paper weaving, it's so amazing! Hence,I wanna do some of my own using templates provided by the author~ ^_^ Links to the HotAir Balloon at PaperMatrix
圖紙很簡單,基本上就一個漩渦狀的圖形外加兩個簡單的小圖形,但是熱氣球需要的是兩個漩渦狀來編織。使用相同的顔色也是可以,但是出來的效果會沒那麽好~~~
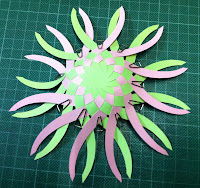
These are the cut outs of patterns provided in the template. Basically a spiral shape and two little simple shape cut outs. In order to weave the hot air ballon, u will need two spiral shape cut outs.
開始的方法呢,是把兩個漩渦狀的圖形,呈反方向的方式重疊在一起,然後開始交叉編制~~~
To start with, place the two spiral shape with opposite side on each other, and then start the weaving, overlapping one and another.
編織到第三,第四層開始就需要利用一些迴文針來輔助,否則的話會很難編的夠緊,松垮跨的很難編織出圓形,而且也就不好看了。。。
After weaving for like 3rd or 4th layer, it will be weaving a round shape and it is time to use clips to enhance the weaving, otherwise it will be very loose and hard to continue weaving.
編織到最後就變成這個樣子,熱氣球出來了~~ ^_^
Continue weaving until the end, and you will have you hot air balloon shape!
熱氣球的底座,製作上相對的簡單了許多,小小的但也不失可愛。
Then move on to the little carriage of the hot air balloon, it is much easier compare to the weaving, but the outcome looks cute too.
熱氣球完成!
Hot Air Balloon Completed!
附上一張在作者網站上看到的效果圖,我就是被這張圖吸引到~~~
Here is a marvelous photo of these hot air balloon by the author, great isn't it?


